Pro Tips
First, it is important to explain whether the three products should always be applied together. Where to place Highlighter, Blush, and Bronzer?
When it comes to the correct application of bronzer and blush, it is often advisable to use only one of the two products - unless it is a matter of contouring. Then both products work well together. The important thing here is that contouring should not be "heavy" and visible. Rather, the technique should look like a natural shadow of the face's shape and structure. Dual Finish is a good choice for effective contouring.
Face shapes
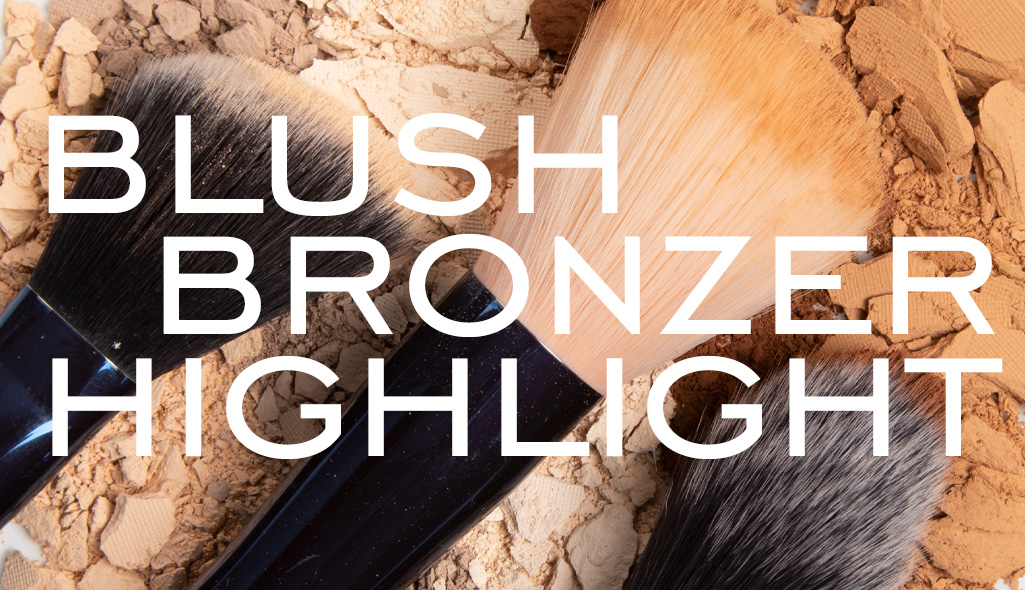
There is no universal answer as to how blusher, highlighter, and bronzer are applied correctly. In fact, it depends entirely on the shape of the face. After analyzing the shape of your model's face (exceptions can be a mix of different shapes), proceed as follows:Oval
The widest part of the face are the cheekbones. The lower half is slightly longer than the upper half, and the face runs in a softening curve towards the chin and forehead.
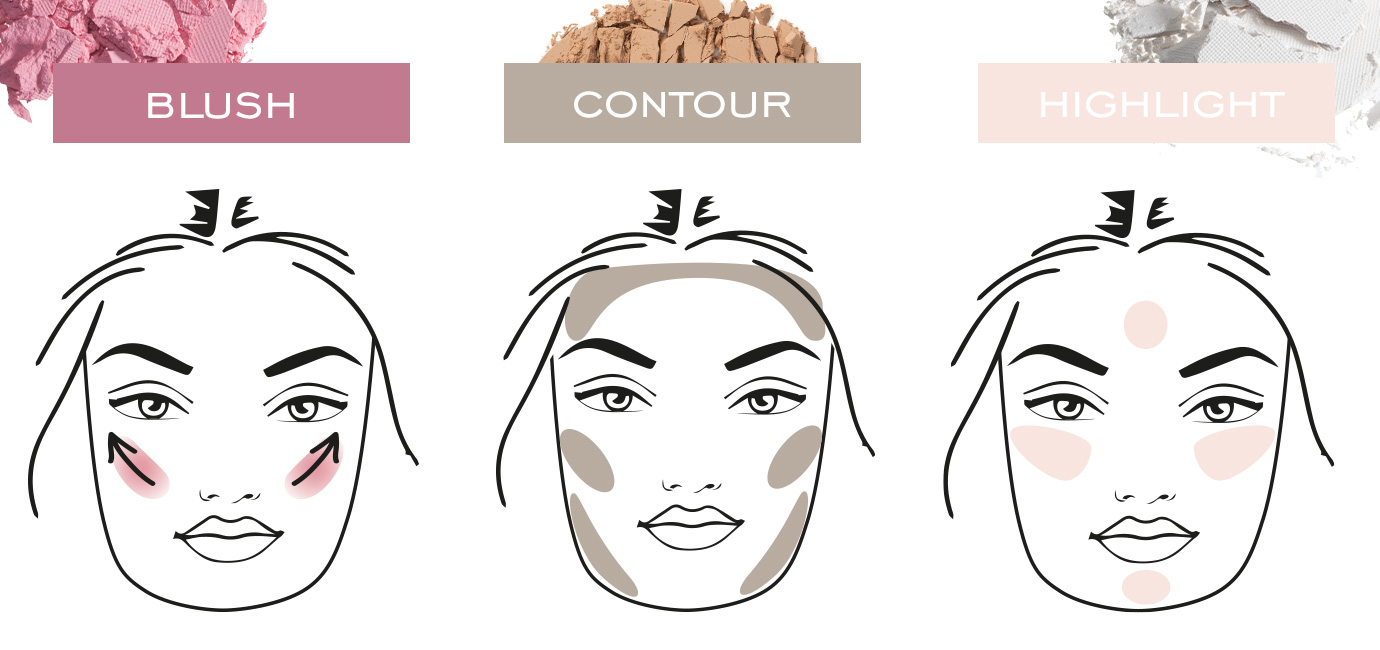
With the face shape often perceived as "ideal", blush should be applied flat and soft, directly on the cheekbones. Highlight the area above the cheekbones and the area under the eyes (the so-called triangle). Gentle contouring slightly below the cheekbones to emphasize the shape of the face is sufficient.
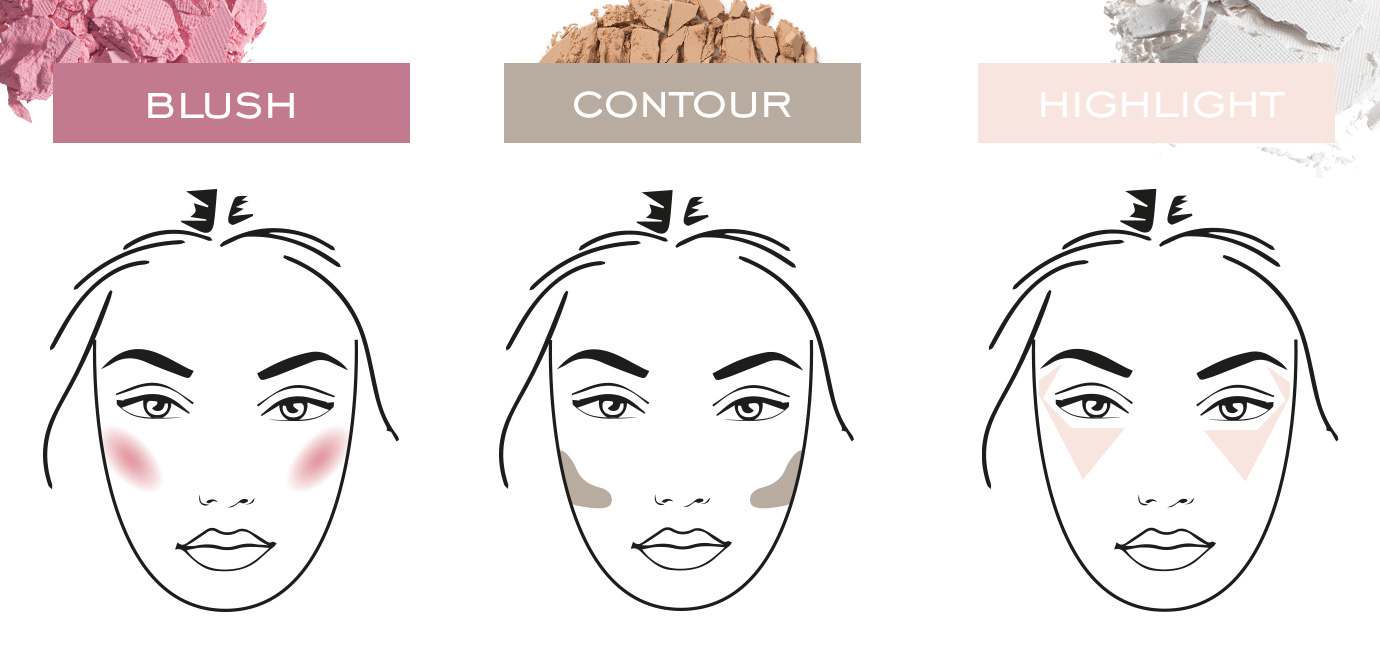
Round
Round faces are often wide in the cheek area. The angular or even oval shape is covered up by a "fuller" overall impression. There are no prominent cheekbones, and the face has no visible edges or corners.
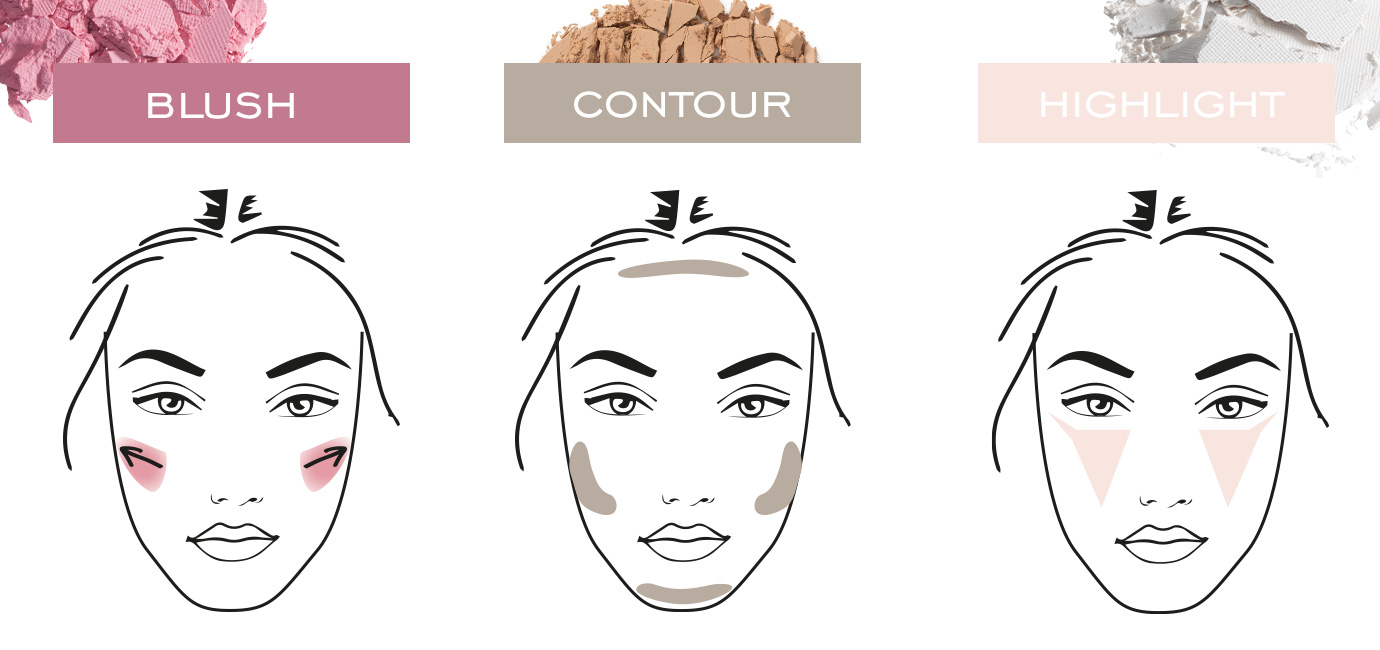
The main goal here is to lift the face shape and emphasize the bone structure. The blush should be applied to the cheeks and then blended along the cheekbones towards the temples. Additionally, a little blush in the center of the chin can help create an oval-looking face shape.
Add some highlights with a lighter concealer under the eyes in the shape of a triangle. Also, emphasize the center of the forehead, the center of the chin, and the bridge of the nose. Iridescent highlighter can also be applied to the upper cheekbones. Contour on the outside of the forehead, temples, below the cheekbones, and on the outer jawline.
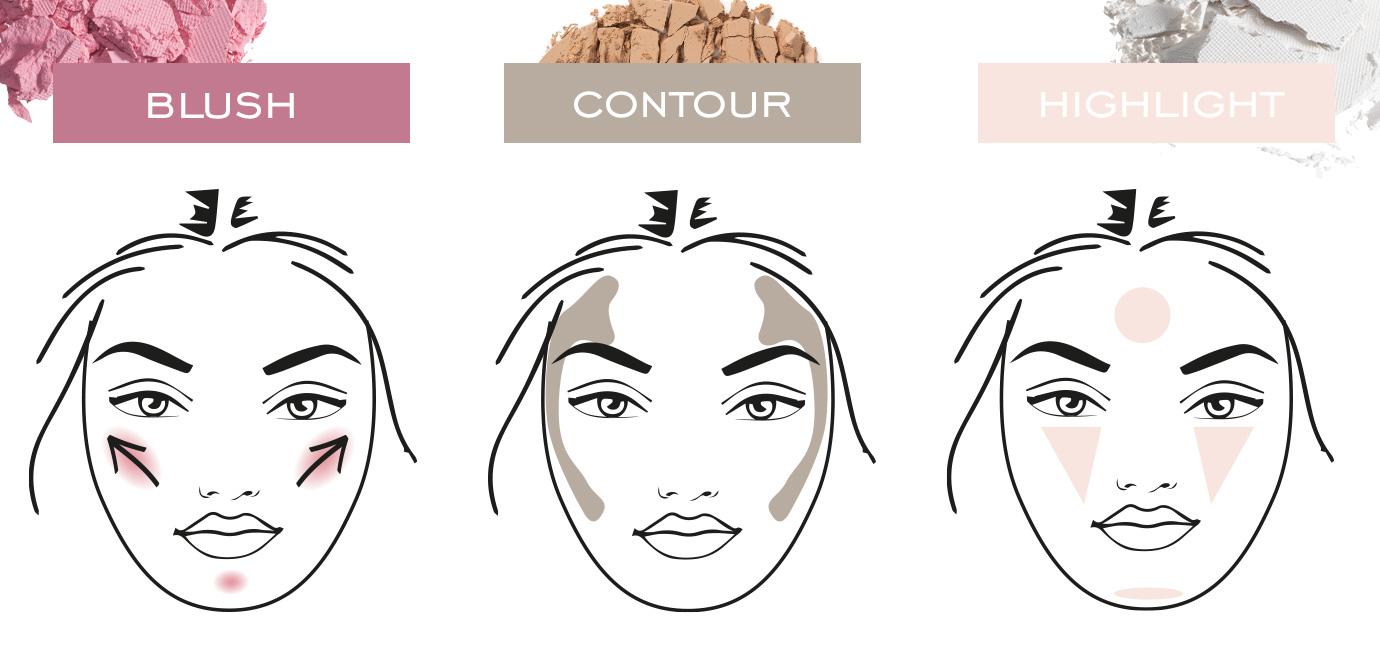
Heart-shaped
Heart-shaped or triangular faces are often characterized by a broad forehead with high-set cheekbones and a tapered chin. The lower half is noticeably narrower than the upper half.
Blush should be applied to the widest part of the cheekbones and blended particularly gently until it ends at the outer corner of the eye. In fact, the task of blushing on this face shape is to correct more prominent cheekbones and conjure up a softer shape. In fact, if the color is applied only in this area, you avoid overemphasizing the cheekbones, which are usually more prominent in heart-shaped faces anyway.
Accentuate the area under the eyes, in the middle of the forehead, and in the middle of the chin with a lighter concealer. Darken the tip of the chin, side forehead areas, and temples until above the cheekbones achieving a soft, natural-looking contour.
Square
Square or prominent faces are characterized by an angular structure on the forehead and chin.
To soften the focus of the chin, which is usually as wide as the cheekbones on this face shape, blush should be applied low. It's best to apply it only to the central area of the cheeks and blend it out to the sides. This softens the focus on the jawline and pulls the face inward a bit.
Highlight the center of the forehead and chin, as well as the area under the eyes, with a concealer a few shades lighter than the foundation. Start contouring at the temples and blend up to the forehead, making it appear a naturally softer shape. With the help of a darker color on the cheeks and lower jawline, you can make the face look less angular.
Long
Long faces are significantly longer than wider. This face shape is usually characterized by a high forehead and a long chin. Cheekbones and jawline are of one width.
Blush should be applied at the level of the outer corner of the eye, and instead of blending it towards the cheekbones, the application should go towards the ear, creating a straight line. Contour above the hairline, below the cheekbones, and a little on the chin. Use a lighter concealer under the eyes than you used for foundation, and then put a little highlight on the upper cheekbones.